Why you should care about AOM Analyzer
Vibhoothi
Hi Folks,
It’s been a while I have written a blog, this is the right time I guess. So lately I am trying to do a kind of research with video encoding in power constrained devices as part of my undergrad thesis project. So I was going into more details about encoders in general. After that, I have also gone through the details about HEVC, AV1 and all.
We all know about very positive development advances in AV1 when we see with HEVC. So if you are not following anything in this digital video field, AV1 is next generation and new standard after HEVC.It could have like 40% better picture quality than HEVCcross-platform but as_of_now the main issue or the main disadvantage of av1 is the fact that it is very compute intensive, for solving this issue the much required thing would be having a nice software which does a full analysis of the video including the metadata.
Now there is a tool called AOM-Analyser which is there for a while
This tool is a bitstream analysis which does various analysis of a video. This is a cross platform tool for macOS, Windows and also Linux. This is also open sourced at GitHub. You can grab it if you want to try out for yourself. We can also download the pre compiled ones and use it if you dont want to build your own. There is a very nice live demo of the tool for anyone to see before downloading.
You can refer to the GitHub readme.
This tool was the first attempt to make some contribution for effective analysis considering the fact that we need huge intense amount of computation power. It is not really feasible for a user to do the encoding things locally because if we want to encode a single video frame it could take very long time ranging from hours to days. Most of the companies and developers run the encoders in the cloud platform running parallely. he anlyser decodes AV1 bitstream and display many information about a particular bitstream. As per tests it is said that for a single 1080p video frame it produces around 4MB of raw image data and big amount of analysis metadata. When one do it locally it can be very small to no issues but when someone does it online will be the biggest enemy would be huge data bandwidth and latency. After lots of discussions the team came up with an ideal solution ie run it directly in cloud which does potentially solve this issue but for running the bitstream analyser one need to also have everything in the JavaScript format, for that team used Emscripten which could do this and run inside the browser itself.
The Analyser is made of two components one is a emscripten compiled version of the codec( decoder.js) and another file which is the frontend of app based of HTML and Typescript.
Anyone can do this analysis of the video, all he/she need to do is specify a video file possibly in “*.ivf” format and also appropriate emscripten script compiled version of the decoder to decode it. The format of this would be like
How to Run
We can use electron for running the analyzer
<em>electron . decoder1 video1</em>
Both decoder and video parameters can either point to a local file or we could also use a remote url.
If you didn’t specify any arguments then it will select any random jobs from areWeCompressedYet.
Like I said earlier if you did download a standalone package of the tool then you don’t need to use electron, you can directly run the binary directly from command line
We can also use multiple decoders for analysis of the video.
There are various other command line options for doing this ie.
- –zoomFactor with this a user can set the default zoom level, suppose if it is too large for your resolution then sets the default zoom level, if you feel that the UI elements are too large then you can set it to either 0.75 or 0.50
- –dev if you pass this then it will open up the electron dev tools which is disabled by default.
- _–frames _which can be used to the specific number of frames we need to decode, by default it is set to 4.
- –split this is a very useful flag which can be used for doing a very good side by side comparison of the video. For this flag to work you might need to do specify at least two videos. When we use this the tool doesn’t show any analyzer layers which does improve decoding faster.
- Left (first video)
- Right (second video)
- Vertical Split (first video on the left, second video on the right)
- Horizontal Split (first video on the top, second video on the bottom)
The best part of this is that everything you did can be easily shared and all this is inside the browser. The decoder JS are generated automatically and submitted to AreWeCompressedYet so anyone can use it.
You can download videos from here for doing the encoding in local machine. I will recommend using in_to_tree, ducks_take_off, crowd_run, old_town_cross, these all are 8bit, one could use either 1080 or 720p as it will be better for doing the test.
Toolbar
AOM Analyzer has a toolbar at the top
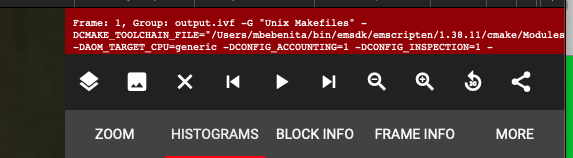
This Toolbar has different options like
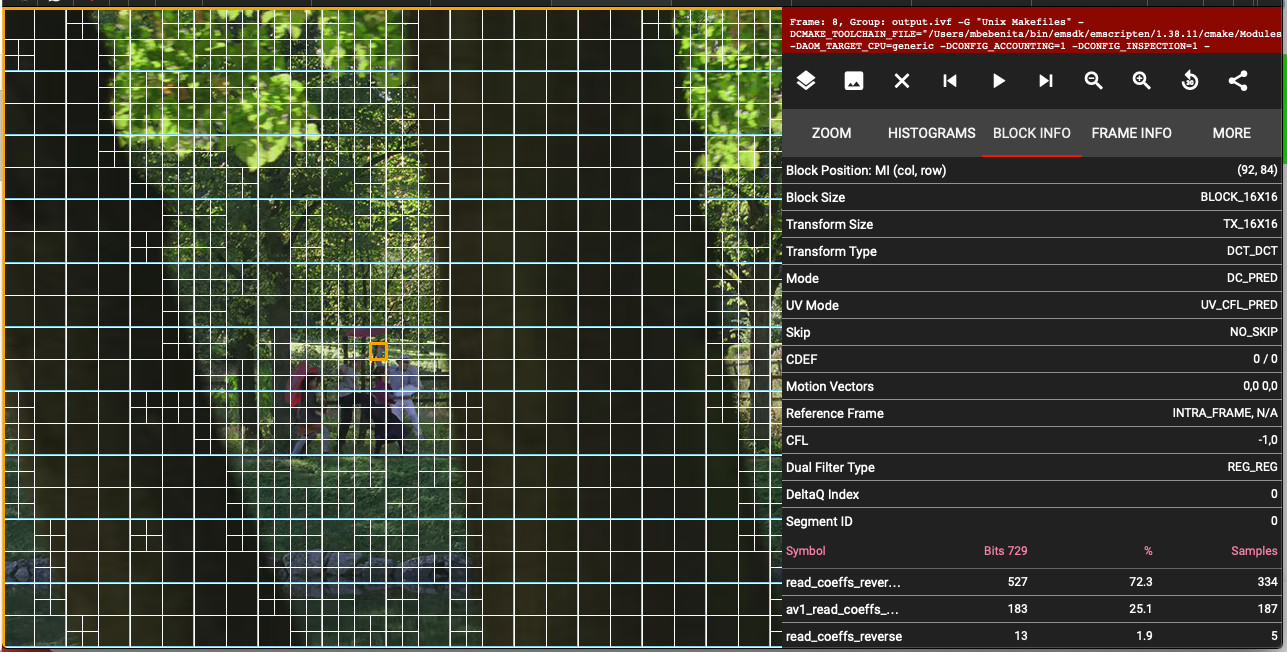
- _Layers: _We can toggle various layers on and off from. With this we can understand what are the different things in the video and can be used to inspect their value in the block info tab. These are the various properties you can toggle from the layer:
- Decoded Image: Shows the decoded image
- Super block grid: Show the maximum possible blocks for the frame.The AV1 supports maximum of 64x64 Blocks while the minimum is 4x4.
- Split Grid: Shows the split grid of the frame using intra frame prediction.
- Transform grid: Shows the transform layer of the frame using intra frame prediction.
- Transform Type: Shows the transform type of the frame.
- Motion Vector: Displays the motion vectors of the frame using inter frame prediction
- Frame reference:
- Mode:
- UV Mode:
- Show segment: Overlays the segment of the video.
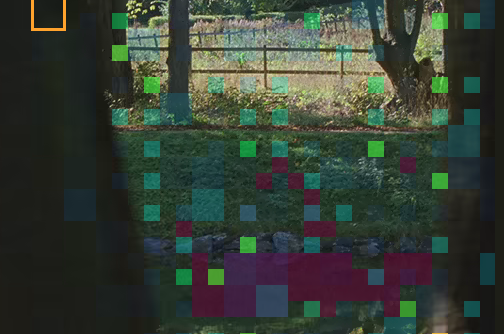
- Bits: Show bit accounting layer, to make it more precise we can disable the image and see. There are three options for bit scale
- Frame Relative: For single frame
- Video Relative: Maximum no of bits is computed over all frames in video sequence.
- Video Relative(all): Same as the video relative, the only difference is it takes all sequence which are loaded so it is useful when we want to compare frames b/w two sequence.
- Heat Map: Shows the bits in a heat map style
- Heat Map(Opaque): This shows in heat map with additional color like blue etc for areas where there is no heatmap generated
- We can also toggle some specific accounting layer’s symbol to get additional information. This can be useful to dive into the bit distribution of a specific symbol.

- Skip: This is mainly used to show whether that a block has coffienets. Usually they are drawn as Voilet/Blue. If we see carefully we can say that bits are overlayed in non-skipped areas.
- Filiters: Show the filiter for the specific frame.
- CDEF: Constrained Directional Enhancement Filter this is built out of three pieces (directional search, the constrained replacement/lowpass filter, and integer-pixel tap placement) that we’ve used before in daala analysis. CDEF is intended to remove or reduce basis noise and ringing around hard edges in an image without blurring or damaging the edge